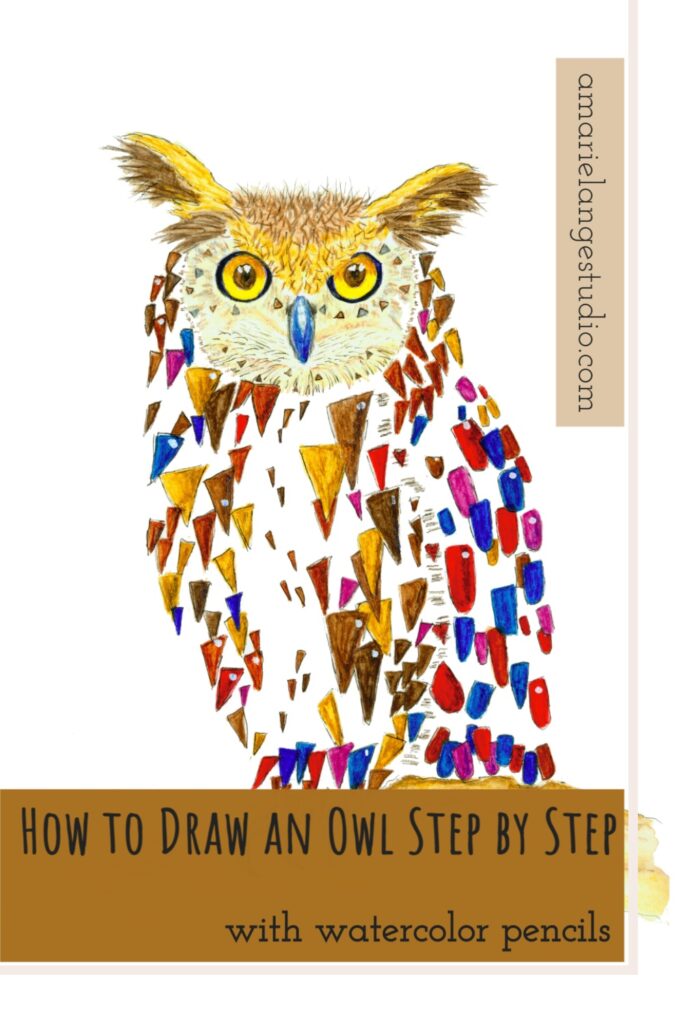
How to draw an owl step by step? It’s not as hard as you might think and there’s not one best way. Especially if you use a step-by-step tutorial that creates a whimsical – almost abstract or cartoon – owl as opposed to a realistic owl.
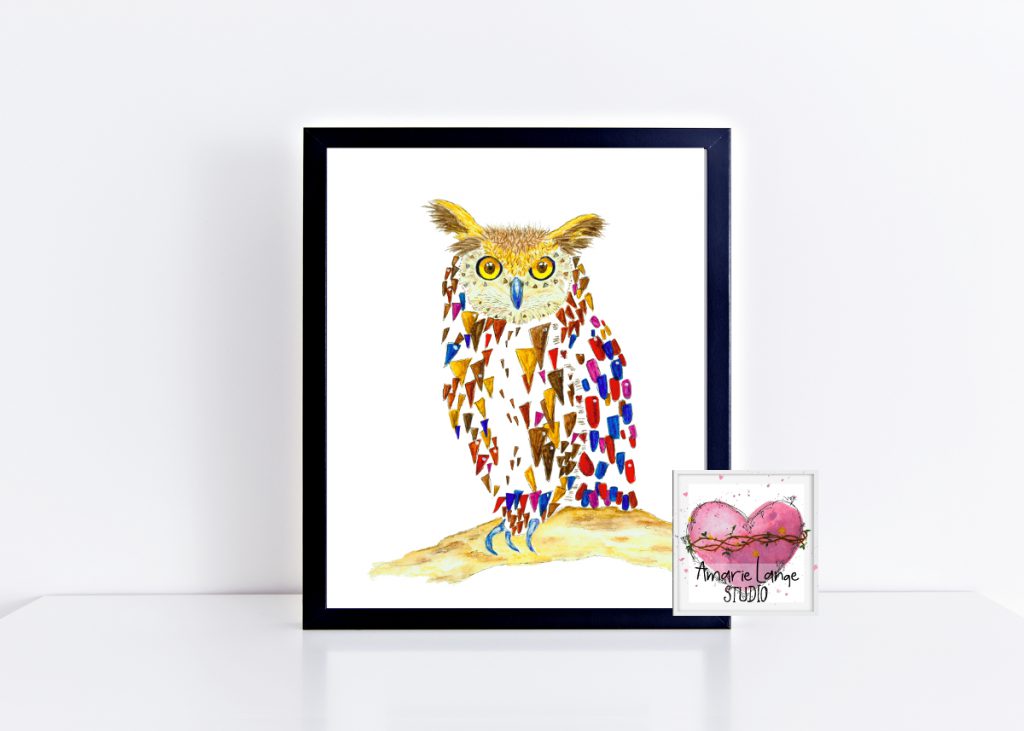
This little owl does not represent a Barn owl or Snowy owls, but a Great Horned owl.
And from the top of the head to the tree branch he’s perched on, he’s full of charm.
(Jump to the free owl sketch printable here.)
How do you draw an owl step by step? Here are the simple steps I have used.
- Choose your owl reference photo and draw an outline
- Add simple shapes to your owl drawing to fill out the outline
- Adding color to your cute owl? Do that now.
- Finish with your own details; owl eyes, shading, inking.
Who doesn’t love a beautiful owl? My owl tutorial is drawn using geometric basic shapes – mainly triangles and other shapes – to represent beautiful feathers in many different colors.
I used watercolor pencils to give this whimsical, creative owl a bright, fun look.
That’s also what makes him easy to draw!
Step 1: Find your owl reference photo and draw an outline of the body of the owl.
I looked at a lot of owls for this project. I looked at reference photos and a wide variety of owl art, both prints and owl statues. At the end of my research I was ready to create this whimsical step-by-step owl art.
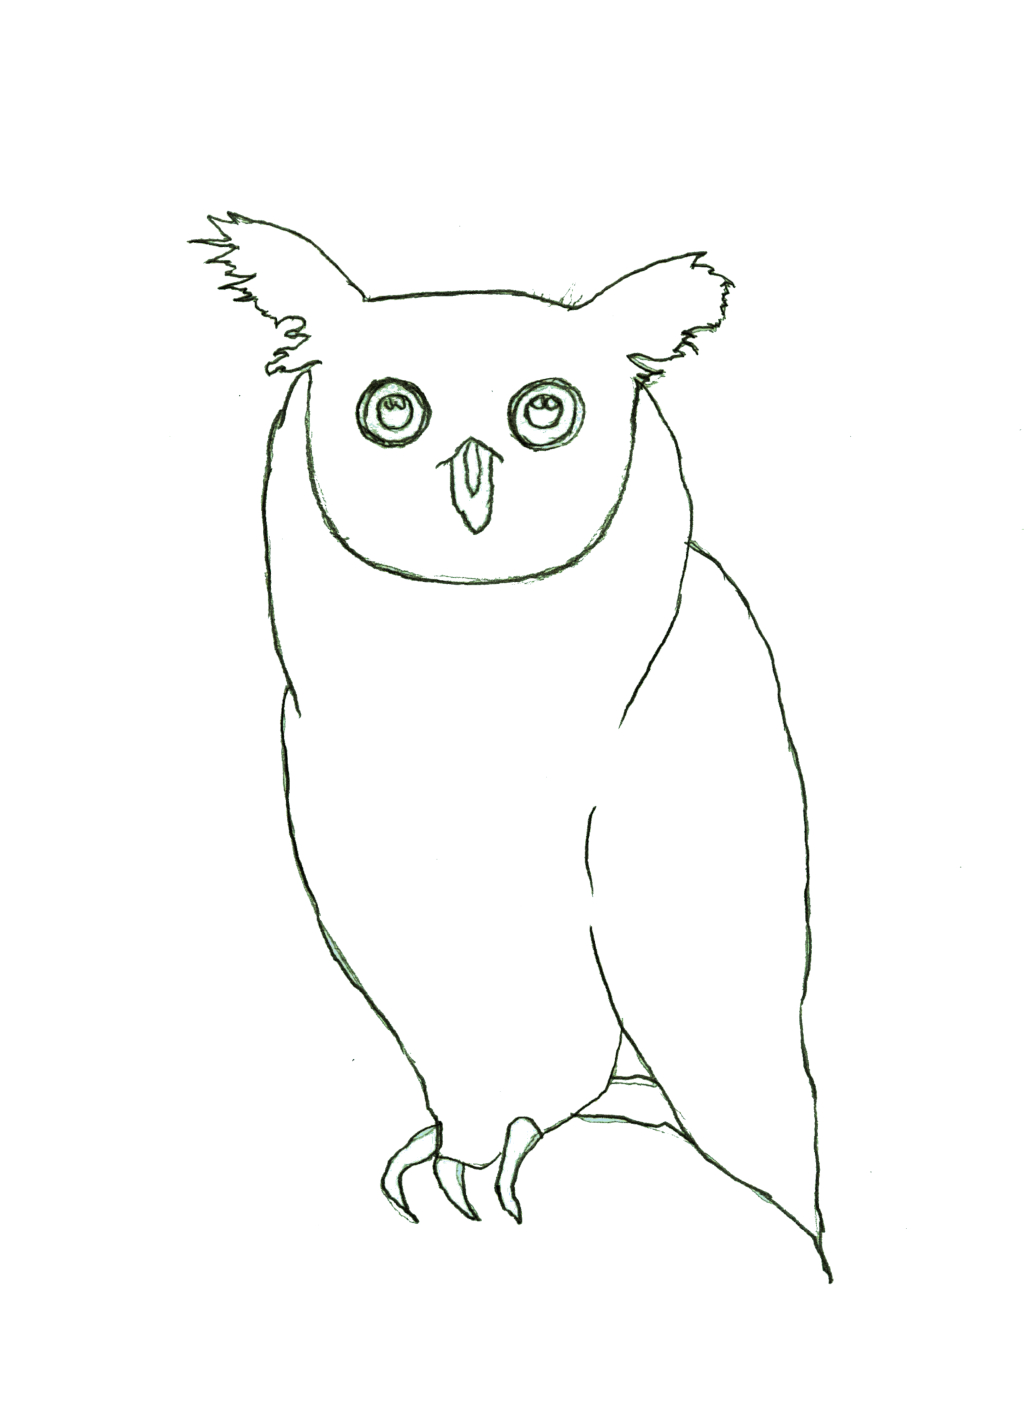
Start by sketching or tracing your easy owl drawing on your paper.
You can use this owl drawing guide – which is quite simplified – or you can use drawing tutorials in greater anatomical detail to draw your owl. Either method is a lot of fun!
If you’re going to color this owl, choose the appropriate art paper for the job.
For example, since I used watercolor pencils, I drew this owl onto watercolor paper.
If you’re wanting to add shading to your simple owl remember to pay attention to your light source. Do you want the light to come from the top? From the left or right? That will determine your shadows and shading.
The first step is to begin by laying out the body of the owl – including the head of the owl – to the size you want.
You’ll need basic drawing supplies for this: besides the correct paper, you’ll need a pencil (either a graphite pencil or a b pencil will work fine), eraser and paint, watercolor pencils or markers/crayons (if you want to color this owl).
You can certainly freehand your cute owl drawing, but the easy way is to trace him onto your paper.
If it helps with placement, you can lightly draw a middle vertical straight line and a middle horizontal straight line onto your sketch, marking the center of the owl. Draw these lines on your reference photo, too. It will help you have a visual reference point and enable you to place your owl’s face and features with confidence and you can erase them later before you paint over them.
If you’re going to color in your owl, sketch in light lines or erase them a bit once you’ve completed the drawing.
There are a lot of curved lines in an owl sketch. For starters, your owl’s head will have a curved line. It’s really a type of circle. Sometimes drawing circles or curved lines can be intimidating. That’s why tracing is a good first step; then you’ll have no worries about getting the owl’s head perfectly proportioned.
Mark the middle of the owl’s head, too. It will help with placement of the facial features. The owl’s eyes are each a smaller circle that you’ll want to get mostly symmetrical.
The top of the head will be little feathers that I drew using random short lines with watercolor pencils. You don’t need to draw all of those tiny feathers in your sketch. Just add a soft line connecting the owl’s ears so you’ll know where those tiny feathers go later on.
The owl’s body shape is a simple ellipse or oval shape.
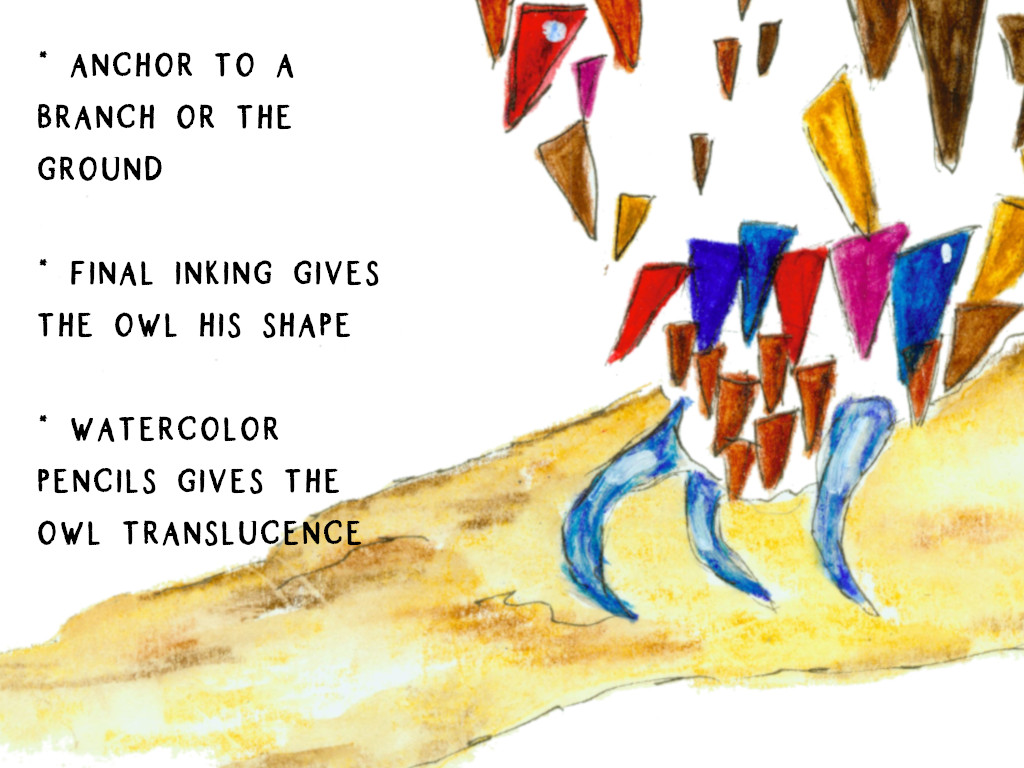
I added a branch to give our owl somewhere to perch. You’ll want to anchor the bottom of the body to something – even set him on the ground – so he doesn’t appear to be floating off without ever flapping his wings.
Step 2: Add simple shapes to your owl drawing to fill out the outline
You’ll need to add very round circles for the owl’s eyes, with small circles inside. A great way to get the eyes proportions correct is to draw around something round to get the right shape. Freehanding circles is very difficult if you’re a beginner. Next, the owl’s face will need a simple beak. Remember, the owl has a large head compared to the size of his body.
Pay close attention to the owl’s proportions. If you’re tracing a sketch you will find that’s the easy way to get the simple shapes of your owl in correct relationship to each other. And feel free to draw more than one owl. After all, a little bit of practice will improve your first owl in different ways than you might think!
It can help to add a few triangles here and there to remind you where you want those when you’re adding color. Or sketch some quick diagonal lines to get the same feel.
Again, this is not a realistic owl. Remember we’re drawing a simple owl shape and adding pizazz through our bright colors and different shapes. Plus it’s good to leave plenty of white space.
Drawing the owl is meant to be a simple step.
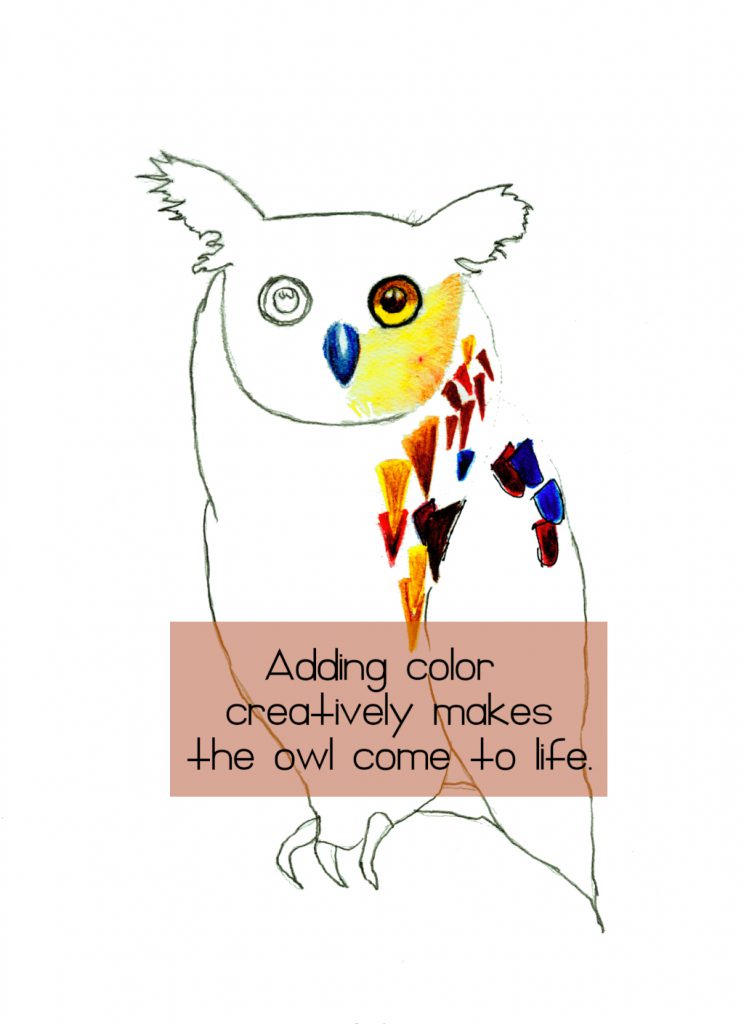
Step 3. Adding color to your cute owl? Do that now.
As we’re learning how to draw an owl step by step, a decision must be made. Do we want a little bit of color, a lot of color with our owl, or do we want to keep this owl a simple sketch?
Since I colored my owl with watercolor pencils, my sketch is pretty plain. Here’s how I added the bright, cheery color to my owl.
This owl’s wing and body are covered with colorful freehand triangular shapes and other geometric shapes representing wings and feathers. You’ll notice there are not a lot of tail feathers showing on this owl. But there are as many individual feathers as you want to draw.
This easy, abstract technique allows you to decide how much or how little feather coverage you want for your drawn owl.
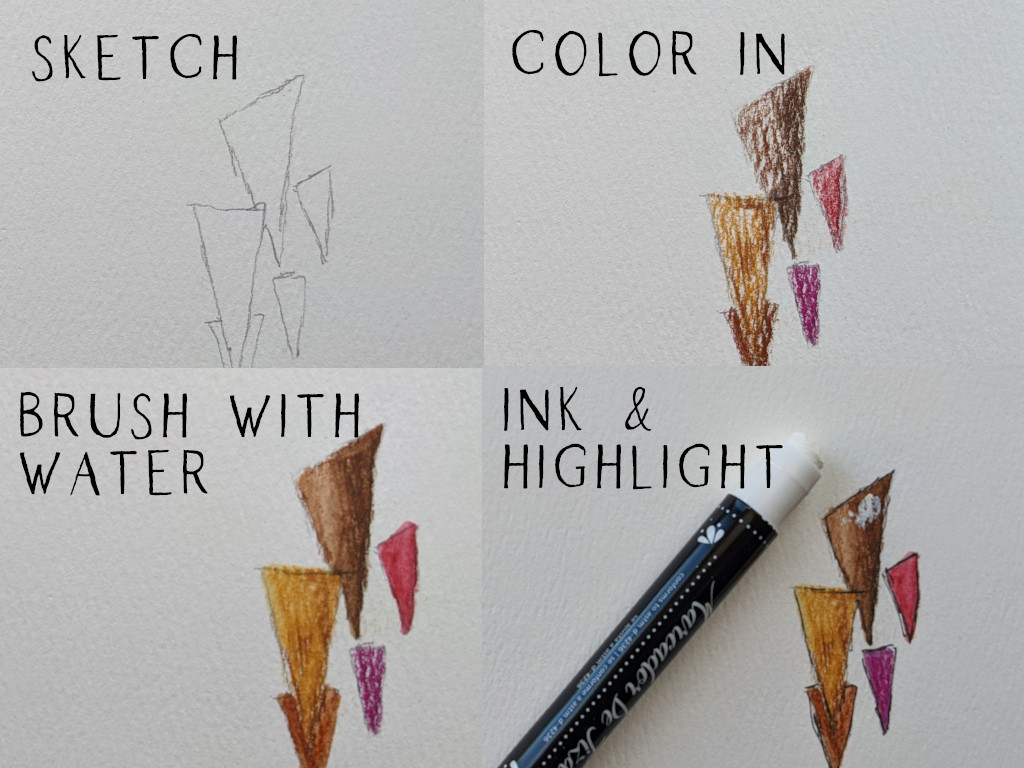
If you’re following along with these drawing lessons, this easy step involves coloring in the triangles placed in the areas you like.
Drawing and coloring these triangular feathers is the fun part of this simple owl artwork.
You can certainly use colored pencils for this step. Add as many layers of color as you like. This adds to the dimension and shape of the owl and the owl’s feathers are an important part of it’s body shape.
I kept the feathers pointing downward but you could make a fluffy feathers look by slightly tilting the pointed end of a few feathers in a more outward direction. The easiest time to do this is while you’re still using pencil – before color is added.
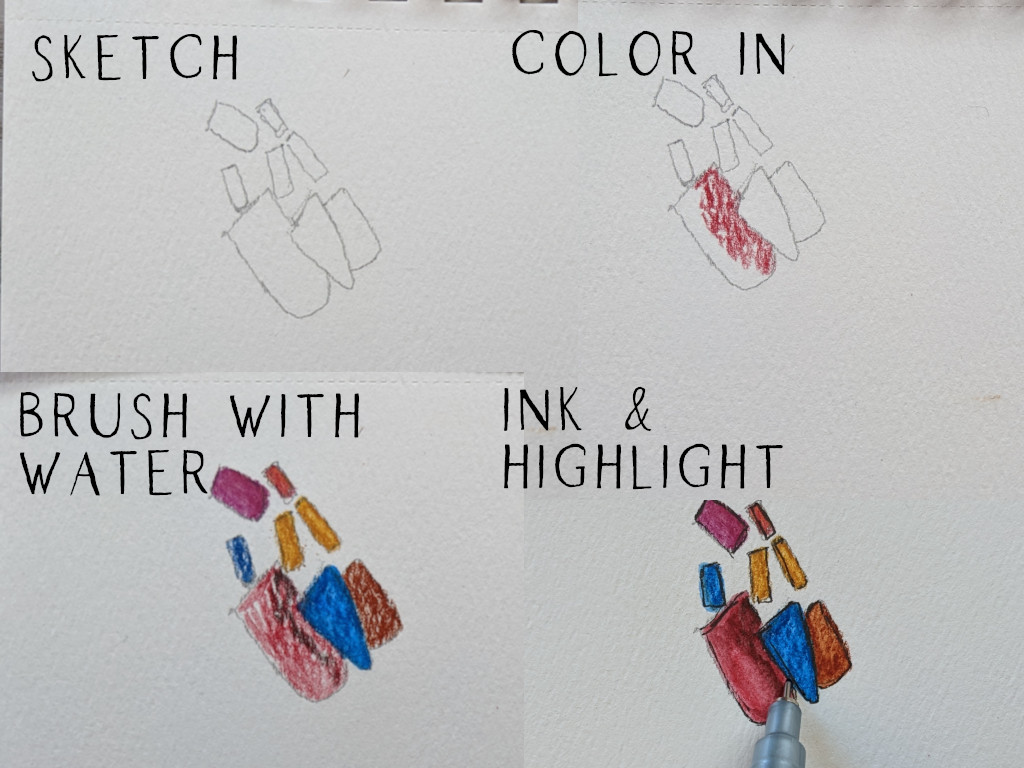
Next step? Using watercolor pencils I added the light colors first, followed by the darker colors.
Then using a small round brush, I used a small amount of water to brush out the different colors.
This is the best way I’ve found to keep the basic shapes we started with but add depth to our friendly owl.
I left in the jagged lines; those mimic actual feathers.
The base of the body is nestled gently against the tree branch, which I also colored with watercolor pencils and then brushed out with water.
Experiment with varying the size and shape of the triangles, just as feathers are also different sizes on different types of owls and even on the same bird.
The owl’s legs remain unseen in our owl drawing tutorial. However you’ll want to get a sharp tip on his claws (owl’s feet) gripping that branch.
There are many different techniques one could use to represent feathers on a drawing like this. Using the geometric shapes gives personality to our owl and is a good way to add the look of complexity without requiring we draw a realistic owl.
Step 4. Next step? Finish with your owl details; completing the head draw, owl eyes, shading, inking.
Let’s move to the top of the owl now.
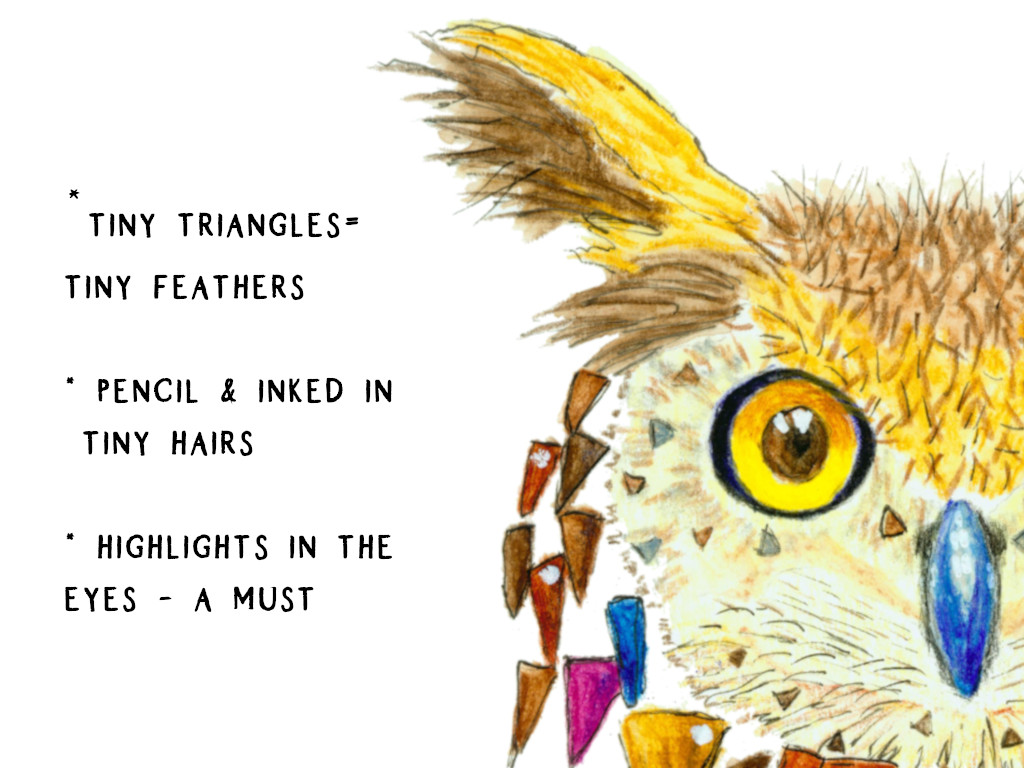
The owl’s face is a very important part of how to draw an owl.
I extended the long line of the owl by adding smaller triangles up around the head.
You might want to practice the eyes on a separate piece of paper before the final draw.
Eyes are tricky, and these are staring right at you!
Make sure you have the large circular shape evenly applied for both eyes and that they’re evenly spaced – remember they’re wide eyes – on the head of the owl at the top of the body.
Adding a shadow on the eye and some highlights will really help your owl’s eyes to stand out.
Most of this step tutorial is not concerned with absolute accuracy; but as I mentioned before, getting your owl’s eyes as round as possible and placing the highlights carefully is very helpful. The facial disk of the owl and his wide eyes will help your eye to say “this is an owl”.
When you look closely you can see mine are not perfectly round. Nevertheless, I was careful to give them a round shape, not little ovals.
Next step, ink that small triangular beak to anchor it in the center of the owl face.
The ears tufts are important, too. Pointy tips will help convey that owl-like feeling in your drawing of an owl!
You’ll notice that on this drawing, these are not perfectly asymmetrical ears. That’s because our little owl is slightly raising one ear, listening.
The bottom part of the head flows seamlessly into the body of the owl.
I added short lines and long pencil strokes to indicate the tiny feathers around the ear tufts, between the ears and on the facial disk.
I also added some inking using a waterproof black pen and white highlights with a gel pen to help those feather shapes stand out. These final details help to make our beautiful owl pop.
So how do you draw a simple owl?
This owl really is simple, but using the geometric shapes and watercolor pencils jazzed him up, for sure. Do you feel like you have more of an answer to the question “how to draw an owl step by step” than you had before?
I hope so. I really want to give you some helpful, beginner-friendly tips. An owl is such an interesting creature and the art of drawing means you have choices in how you want your owl to look.
Like anything else, drawing an owl benefits from practice. Even this quick tutorial will go more smoothly once you’ve done it a time or two.
There are so many different ways to draw or sketch an owl. I hope you’ve drawn along with me while I’ve shown you how I drew my owl. You can always pop back to the previous step and take your time while you learn.
Honestly, take all the time you need.
There are more beginner friendly watercolor ideas to choose from on this blog. What about drawing an apple or practice making watercolor water?
Drawing and painting are so much fun. Keep practicing and enjoying the process.
You can do this!
Try creating your own owl or if you prefer, you can get this printable watercolor owl in my Etsy shop here.
What Will You Draw Next?

Hopefully reading about how to draw an owl has wet your appetite for learning more drawing tips and tricks. How about trying your hand at drawing a fun vintage truck?